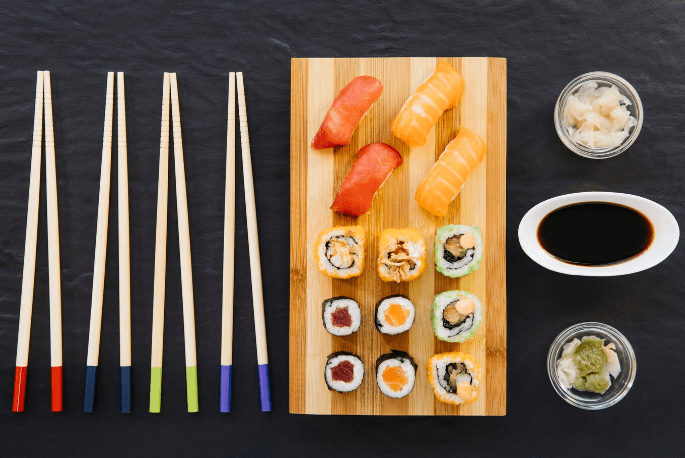
Easy Steps to Roll Sushi Without a Mat

Are you a sushi lover who wants to make homemade sushi, but doesn’t have a mat? Don’t fret! Rolling sushi without a mat is easier than you think. With just a few simple steps and ingredients, you can create delicious sushi rolls right in the comfort of your own kitchen. In this blog post, we will guide you through the process of making perfect sushi rice, preparing fresh fillings, and rolling your own sushi without using a traditional mat. So put on your apron and get ready to impress yourself (and others) with your homemade sushi-making skills!
Easy Steps to Roll Sushi Without a Mat
Rolling sushi without a mat may seem like an impossible feat, but it’s actually quite simple once you get the hang of it. All you need are a few basic ingredients and some patience.
First things first, make sure to gather all the necessary tools and ingredients before starting your sushi-making adventure. You’ll need rice vinegar, nori sheets, sushi rice, fillings of your choice (such as avocado or cucumber), a sharp knife for cutting the roll, and a clean surface to work on.
Begin by preparing your sushi rice according to package instructions. Once cooked, add in rice vinegar for flavor and allow it to cool completely.
While waiting for the rice to cool down, prepare your fillings by slicing them into thin strips. Make sure they’re long enough so that they can be placed horizontally across the nori sheet.
Next up is preparing your nori sheets by cutting them in half lengthwise with scissors. Lay out one half of the sheet shiny side down on a flat surface such as a cutting board or countertop.
Now comes the fun part – spreading out the cooled-down sushi rice onto the nori sheet in an even layer using wet hands or utensils. Leave about 1 inch at one end uncovered so that you can seal off your roll later on.
Once you’ve spread out your rice evenly over one half of the nori sheet, place your desired fillings on top near where you will start rolling from. Be careful not to overfill as this will make rolling difficult later on!
To begin rolling without using a mat: take hold of both sides of Nori with filling inside; fold bottom edge upwards till touch with its opposite side then pull back slightly while pushing forward gently until tight around filling creating cylinder shape making sure everything stays intact! Repeat process till entire Noris has been rolled up tight forming cylinder shapes filled with delicious flavours ready slice & serve!
What You Need to Roll Sushi Without a Mat
Rolling sushi without a mat may seem like a daunting task, but with the right tools, it can be just as easy as using one. Here’s what you’ll need to roll sushi without a mat:
Sharp knife: A sharp knife is essential for cutting your ingredients and slicing your finished rolls.
Bamboo skewers or chopsticks: You will need something to spread the rice evenly on the nori sheet, bamboo skewers or chopsticks work great for this purpose.
Plastic wrap: This helps prevent sticking during the rolling process and makes clean up easier.
Nori sheets: The seaweed wraps that hold all the deliciousness together
Sushi Rice: Short-grain Japanese rice works best for making sushi
Fillings of your choice: Choose from fresh vegetables, raw fish, cooked shrimp or other proteins.
Soy sauce and wasabi (optional): These condiments enhance the flavor of homemade sushi rolls.
With these basic tools in hand, you’re ready to start creating delicious homemade sushi rolls without a mat!
Preparing Your Sushi Ingredients
Before you start rolling sushi without a mat, it’s essential to prepare your ingredients properly. You’ll need fresh and high-quality ingredients to make delicious homemade sushi.
Making Perfect Sushi Rice
The first step is preparing the rice since it’s the foundation of any good sushi roll. Make sure to rinse the rice thoroughly until the water runs clear, then add enough water and let it soak for at least 30 minutes before cooking. Once cooked, mix with seasoned sushi vinegar while gently fanning it to cool down.
Preparing Fresh Fillings
Next up are fillings that can be customized based on your preferences. Popular options include cucumber, avocado, crab meat or salmon sashimi. Cut them into thin sticks or slices so they fit nicely in your rolls.
Getting Your Nori Ready
When working with nori sheets, make sure they’re crisp and dry by briefly heating them over low heat on both sides using a stove. This will prevent them from breaking easily when rolled.
By following these simple steps in preparing your sushi ingredients correctly beforehand will help ensure that you end up with great tasting homemade rolls!
Making Perfect Sushi Rice
Sushi rice is the backbone of any sushi roll. It should be sticky and flavorful without being too mushy or dry. Here’s how to make perfect sushi rice every time.
Start with high-quality short-grain Japanese rice. Rinse the rice several times until the water runs clear, then soak it for at least 30 minutes before cooking.
Next, measure out your water carefully – you’ll need a little more than one cup of water for each cup of uncooked rice. Add both to a pot with a tight-fitting lid and bring to a boil over medium-high heat. Once boiling, reduce heat to low and let simmer for about 15-20 minutes or until all the liquid has been absorbed.
While your rice is cooking, mix together seasoned vinegar made from sugar, salt, and rice vinegar in a small saucepan on low heat until dissolved.
Once your cooked rice is done steaming (let it sit covered off the heat for another 10-15 minutes), transfer it into a wide bowl or shallow pan using a wooden spoon or spatula while fanning it gently with something like an uchiwa fan if possible.
Drizzle over your seasoned vinegar mixture evenly across the top of the hot cooked sushi rice while mixing/stirring lightly but thoroughly as you go along so that every grain gets coated well without smashing them down completely.
When finished seasoning/rice-mixing/cooling process are complete; use this perfectly fluffy yet still slightly sticky sushi rice as desired in all manner of delicious homemade sushi recipes!
Preparing Fresh Fillings
One of the keys to making delicious homemade sushi without a mat is using fresh, high-quality ingredients. When it comes to fillings, the sky’s the limit in terms of what you can use! From classic options like avocado and cucumber to more adventurous choices like cooked shrimp or smoked salmon, there are plenty of tasty filling options out there.
To prepare your fillings, start by washing and chopping up all your ingredients into small pieces. This will make them easier to roll up inside the sushi rolls. Make sure that any seafood or meat is fully cooked before adding it as a filling.
If you’re using vegetables like carrots or bell peppers, consider blanching them first for just a few seconds in boiling water. This will help soften them slightly and make them easier to chew when rolled up in sushi.
Don’t forget about sauces and seasonings! Soy sauce, wasabi paste, pickled ginger – these are all great accompaniments to sushi that can add an extra burst of flavor with every bite. Experiment with different combinations until you find your perfect match!
Getting Your Nori Ready
When it comes to making homemade sushi, getting your nori ready is a crucial step that shouldn’t be overlooked. Nori is the dried seaweed sheet that serves as the outer layer of your sushi roll and provides a subtle briny flavor.
To get your nori ready for rolling sushi without a mat, you’ll need to ensure that it’s slightly dampened. This will help prevent tearing and make it easier to handle during the rolling process.
One way to dampen your nori sheets is by using a spray bottle filled with water. Simply mist each sheet lightly on both sides until they become pliable but not too wet.
Alternatively, you can also use a clean damp towel or cloth to wrap around the stack of nori sheets and let them sit for several minutes until they soften up.
It’s important not to oversaturate your nori sheets with too much water or else they may become soggy and difficult to work with. Just remember, a little bit of moisture goes a long way in preparing perfect homemade sushi rolls!
Steps to Roll Sushi Without a Mat
Rolling sushi without a mat may seem daunting at first, but it’s actually quite simple. Here are the steps to get you rolling your own sushi in no time.
First, lay out a sheet of nori with the shiny side facing down. Next, wet your hands so that the rice won’t stick and spread an even layer of prepared sushi rice over the nori, leaving about an inch at one end uncovered.
Add your desired fillings on top of the rice. Be sure not to overfill or it will be difficult to roll later on.
Using both hands, pick up the edge of nori closest to you and gently start rolling away from you while keeping everything tight. As you roll, use your fingers to tuck in any stray ingredients and make sure everything remains snugly packed together.
Once rolled tightly together into a cylinder shape, moisten the exposed strip of nori with water and seal it closed by pressing firmly with your fingertips.
Use a sharp knife dipped in water to cut even slices across the roll while applying gentle pressure. Serve on a platter alongside soy sauce for dipping!
Don’t worry if your first few attempts aren’t perfect – practice makes perfect! With these easy steps and some patience during assembly time, soon enough you’ll be able to create delicious homemade sushi rolls without needing a mat.
Laying Out Your Nori
The first step to rolling sushi without a mat is laying out your nori. The shiny side of the nori should be facing down, and the rough side should be facing up.
Take care not to handle the nori too much, as it can become brittle and break easily. If you need to adjust its position, do so gently.
Make sure that your workspace is clean and dry before laying out your nori. Any moisture on the surface can cause the nori to become soggy and difficult to work with.
Be mindful of how much rice you use when spreading it out over the nori. You want an even layer that covers most of the sheet but leaves some space at one end for rolling.
If you’re worried about getting enough filling in each roll without using a mat, consider adding more than one type of filling or cutting them into smaller pieces for easier distribution.
Remember that practice makes perfect when it comes to rolling sushi without a mat. Don’t worry if your first attempt isn’t perfect – keep trying until you get it right!
Spreading Your Rice
Spreading your rice is an important step in making sushi without a mat. To ensure that the rice is evenly spread, it’s best to use a flat spoon or spatula.
Start by wetting your utensil with water to prevent the rice from sticking. Then, take a handful of sushi rice and place it onto the nori sheet. Gently press down on the rice to make sure it sticks to the nori.
Next, use your utensil to spread out the rice into an even layer across the entire surface of the nori sheet. Be careful not to push too hard and tear through the delicate seaweed.
Make sure that there are no gaps or holes in between each grain of rice as this can affect how well your sushi will roll up later on.
If you find that some areas have more or less rice than others, adjust accordingly until everything is distributed evenly across all sides of your nori sheet.
Remember, practice makes perfect when spreading sushi rice without a mat! With some patience and technique, you’ll soon be rolling sushi like a pro in no time.
Adding Your Fillings
Now that your sushi rice and nori are ready, it’s time to add the fillings. The key here is to not overfill your sushi roll as this may result in it being too difficult to roll up properly.
Start by placing a small amount of filling at one end of the nori sheet, leaving enough space for rolling. You can use any combination of ingredients you like – from traditional options like raw fish or avocado to more unique choices like mango or cream cheese.
Make sure that whatever fillings you choose are cut into thin strips so they can easily fit inside the roll. You’ll also want to make sure that they’re evenly distributed across the length of your sushi roll.
Once you’ve added all your fillings, it’s time to start rolling! Use both hands and gently lift up on the edge closest to you while keeping everything else in place with your other hand. Roll tightly until you reach the end then press down lightly on top of the finished roll.
Remember, practice makes perfect when it comes to making homemade sushi rolls without a mat!
Rolling Your Sushi Without a Mat
Rolling sushi without a mat might sound intimidating, but it’s actually quite simple. Once you have your sushi rice and fillings ready, the rolling process can begin. Here are the steps to roll sushi without a mat.
Firstly, lay out your nori sheet on a clean surface with the shiny side facing down. Wet your hands with water to prevent sticking and grab some rice. Spread an even layer of rice across the nori sheet, leaving about half an inch at the top uncovered.
Next, add your fillings in a line across the center of the rice-covered nori sheet. Be sure not to overfill or it will make rolling more difficult.
To start rolling without a mat, use both hands to hold onto the edge closest to you while using your thumbs and fingers to keep filling inside as you lift up and over towards yourself until completely rolled.
Press gently along all sides of your roll for better shape retention before cutting into bite-sized pieces using a sharp knife dipped in water between each cut for cleaner edges.
With practice and patience, anyone can master this technique!
Cutting Your Sushi Roll
Once you have successfully rolled your sushi, it’s time to cut it into bite-sized pieces. Using a sharp knife, gently slice the roll in half first. Then, slice each half again until you have 6-8 even pieces.
It’s important to wipe your knife clean with a damp cloth between cuts to prevent sticking and ensure evenly sliced pieces. You can also wet the blade slightly with water or vinegar for easier cutting.
When cutting your sushi roll, be careful not to apply too much pressure as this can cause the filling to spill out or damage the shape of the roll. Use swift and gentle motions instead.
If you’re having trouble getting clean cuts, try using a serrated knife or dental floss instead. Dental floss is particularly useful for softer fillings like avocado or cooked fish as it won’t squish them down when slicing through.
Once you’ve finished cutting your sushi roll, arrange them on a serving plate and garnish with sesame seeds or chopped scallions for added flavor and presentation appeal.
Tips for Rolling Sushi Without a Mat
Rolling sushi without a mat may seem daunting at first, but with a few tips and tricks, you can be rolling like a pro in no time. Here are some helpful tips to make your homemade sushi-making experience even smoother.
Firstly, use plastic wrap or parchment paper instead of a bamboo mat. Place the plastic wrap on top of your working surface and lay out your nori sheet on top.
Secondly, keep your hands moist while handling the rice. This will prevent it from sticking to your fingers and make spreading it onto the nori much easier.
Thirdly, don’t overload your sushi roll with too many fillings. Overcrowding can cause difficulty when rolling and result in an uneven shape.
Fourthly, apply gentle pressure as you roll to ensure that everything stays together nicely. It’s important not to press down too hard as this could squish out all of the filling!
Use a sharp knife when cutting through your rolled sushi for clean slices. Dip the knife into water before each cut to prevent sticking.
By following these simple tips for rolling sushi without a mat, you’ll be able to create delicious homemade rolls in no time!
Three Easy Sushi Recipes to Try Without a Mat
If you’re feeling adventurous and want to try making sushi without a mat, here are three easy recipes to get started.
1. Veggie Roll: Start by thinly slicing your favorite veggies like cucumber, avocado, carrot and bell pepper. Then lay out the nori sheet shiny side down and spread cooked sushi rice evenly on top leaving a half-inch border at the top edge. Add your sliced vegetables in the center of the rice in a straight line. Use your fingers to lift up the bottom edge of nori sheet while holding onto fillings with other hand.
Roll tightly around filling.
2. Spicy Tuna Roll: Mix together canned tuna (drained), mayonnaise, Sriracha sauce, green onion and sesame oil in a bowl until well combined. Lay out your nori sheet then add prepared sushi rice on top.
Spread spicy tuna mix over it leaving one inch space at far end.
Roll gently towards opposite end.
Use water if needed for sealing roll closed.
3.California Roll: Cut avocado into thin slices.
Remove tails from shrimp.
Cut cucumber into matchstick-sized pieces.
Lay out Nori Sheet shiny side facing downwards.
Add Sushi Rice Spread.
Fill with cucumber sticks,sliced avocados,and shrimps.
Wrap it all up tightly by rolling forward using plastic wrap as guide.
Make sure ends are sealed before cutting them apart.
Serve immediately or refrigerate until ready to eat!
These easy homemade sushi rolls will impress yourself as well as guests!
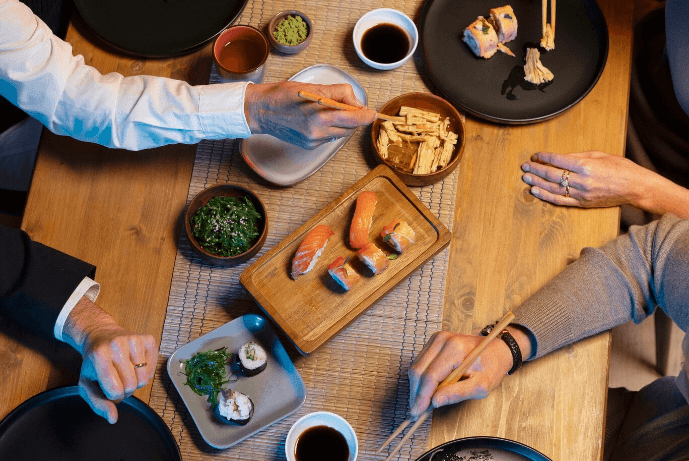
Serving Your Homemade Sushi
Now that you have successfully rolled your own sushi without a mat, it’s time to serve and enjoy your creation. Serving homemade sushi can be as simple or elaborate as you want it to be.
One easy way to present your sushi is on a traditional Japanese wooden platter, which can add an authentic touch to the overall experience. Another option is using individual plates or bowls for each serving.
When placing the sushi on the plate or platter, arrange them neatly with enough space in between each piece. You may also want to garnish your sushis with some sliced ginger, wasabi and soy sauce.
If you’re feeling adventurous, try experimenting with different sauces such as spicy mayo or eel sauce and drizzle them over the rolls for added flavor. You could even create a dipping station if hosting a gathering of friends or family!
Remember that presentation plays an important role in enjoying food. Take some time arranging and decorating your dish before digging in!
Cleaning Up After Sushi Making
Cleaning up after sushi making is an important part of the process. It’s essential to clean as you go so that you don’t have a huge mess to deal with at the end. Here are some tips for cleaning up after making homemade sushi.
Start by wiping down your work surface with a damp cloth or paper towel. This will help remove any excess rice, nori, or filling ingredients that may be left behind.
Next, wash your hands and any utensils that were used in the sushi-making process. Use warm water and soap to ensure everything is properly cleaned.
If you used a cutting board, make sure it’s thoroughly washed and sanitized before putting it away. You can use a solution of vinegar and water or bleach diluted in water to disinfect the cutting board.
Don’t forget about cleaning up any spills or splatters on nearby surfaces such as countertops, floors, or walls. Use a cleaning solution appropriate for each surface type.
Store any leftover ingredients properly in sealed containers in the refrigerator until they’re ready to be used again.
By following these simple steps for cleaning up after sushi making, you’ll keep your kitchen tidy while enjoying delicious homemade sushi creations!
Conclusion
Rolling sushi without a mat may seem intimidating at first, but with the right ingredients and techniques, it can be an easy and enjoyable experience. Remember to use fresh and quality ingredients for best results.
Preparing your own homemade sushi allows you to experiment with different fillings and flavors that cater to your taste. Plus, it’s also a fun activity to do with friends or family.
Next time you’re craving sushi but don’t have access to a mat, give these steps a try. Who knows? You might even prefer this method over using a traditional mat in the future.
Have fun making sushi from scratch!